Monthly Archives: February 2021

The Soapbox Plays: Little Wars (The Battle of Chopinburg House)

I got a chance to play a game of Little Wars with our very own parvusimperator last weekend, taking advantage of the slightly larger amount of floor space available at his apartment to bring out the printed scenery and the expanded armies I’ve been working on since the last game. Since it’s parvusimperator’s baptism by fire, we decided to play without any extra rules, Original Wells style. So, without further ado…

The Battle of Chopinburg House

The red and blue armies meet at the ruins of Chopinburg House, a manor on the Continent destroyed in an earlier battle, and a vital point in the local road network.

00-overview.jpg
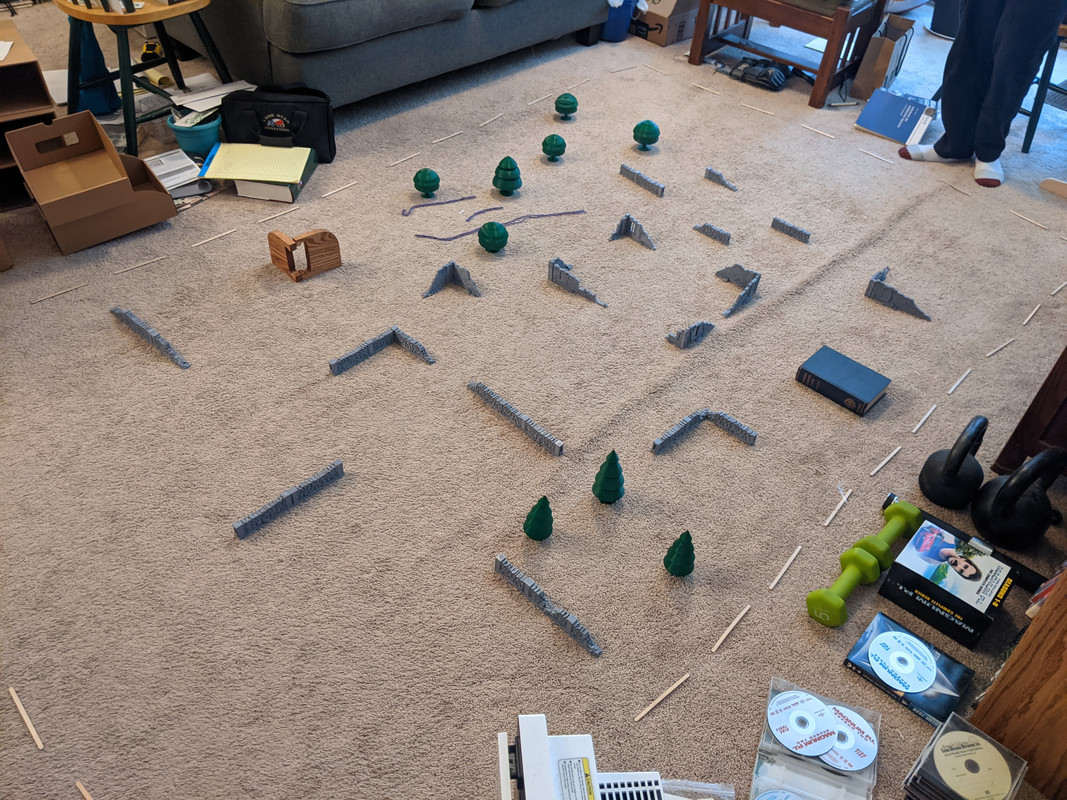
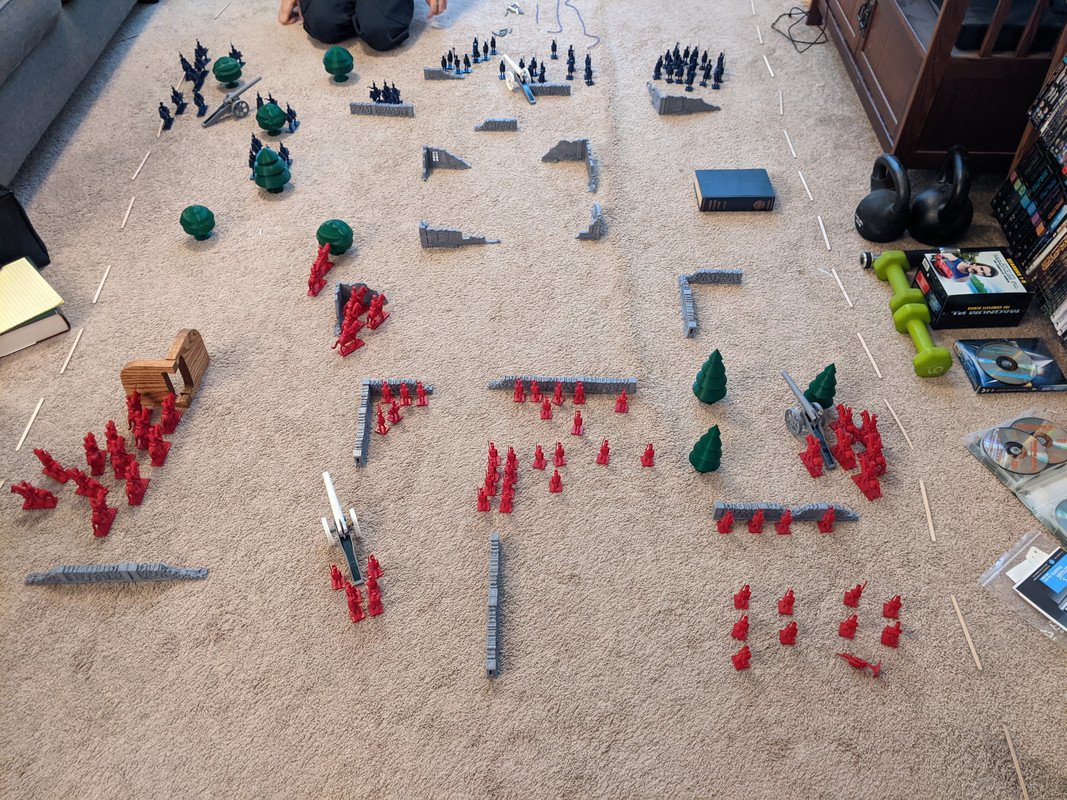
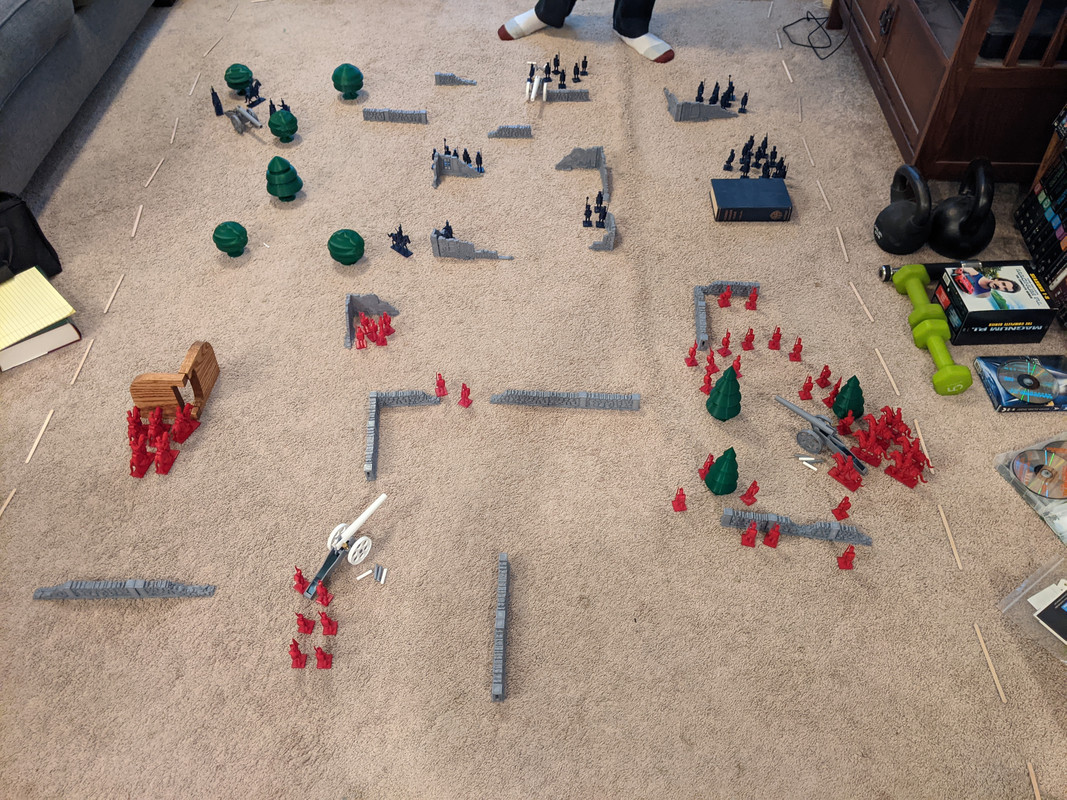
North is to the upper right. I’m controlling the red forces; parvusimperator has the blue.

The central feature of the battlefield is Chopinburg House itself, just north of the center of the field. To the west of Chopinburg House is the orchard, and south of the orchard is the chapel. On the north and south of the house are the northern and southern fields, marked by stone walls. Southeast of the house is Chopinburg Wood, and the various remaining ruins and buildings (one represented by a book) are various outbuildings for the manor itself.

01-red-deployment.jpg

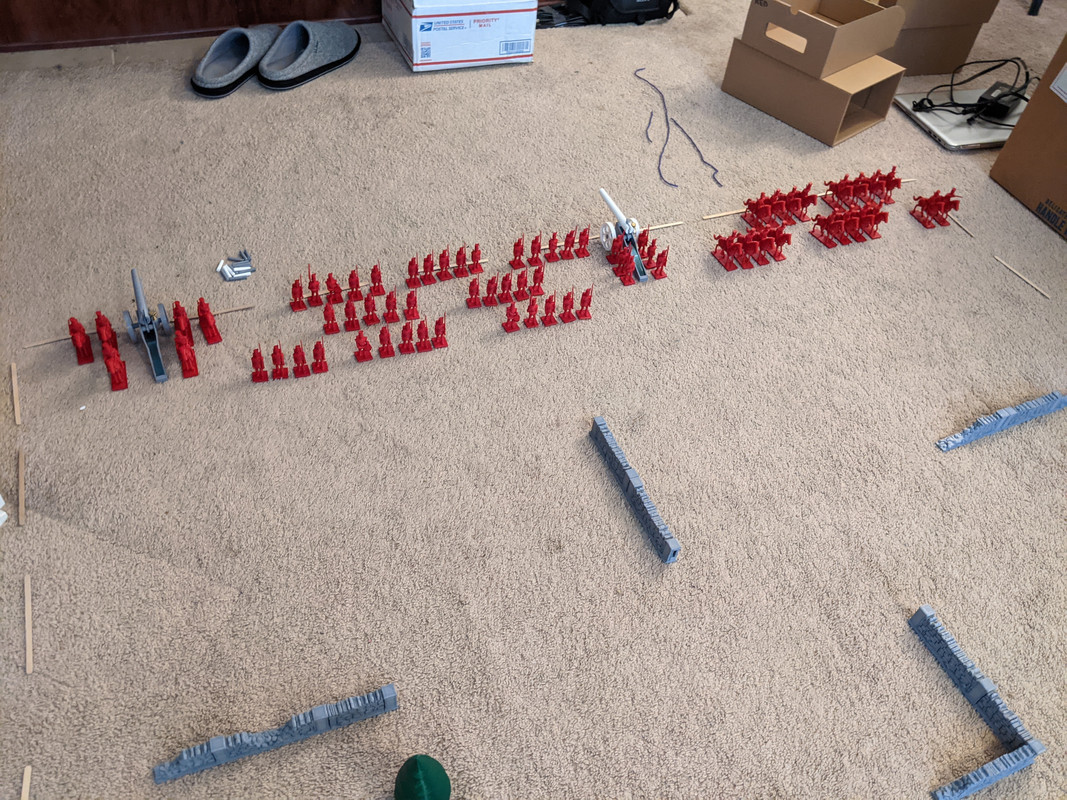
The red forces deploy in what’s becoming my traditional formation: infantry in staggered files to make a harder artillery target, cavalry striking force on the left, one unit of horse artillery and one of foot artillery.

02-blue-deployment.jpg

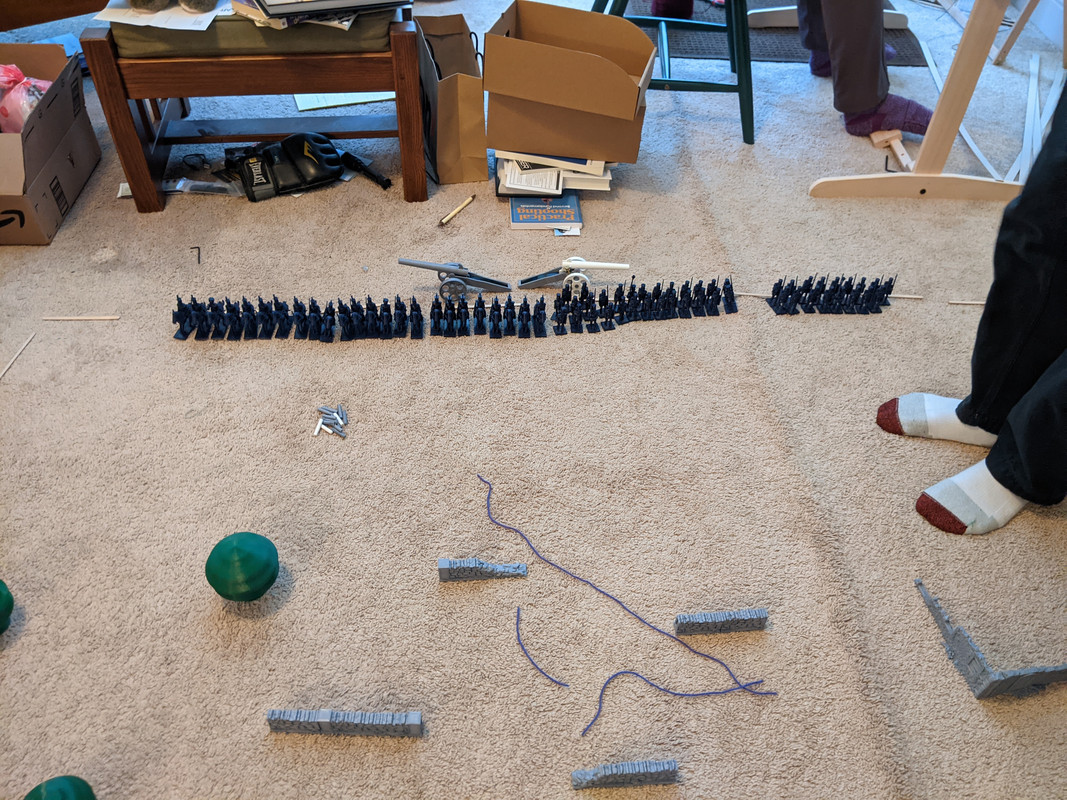
Parvusimperator’s deployment is ‘blob’, which is faster to set up and doesn’t make much difference beyond aesthetics. His cavalry is largely concentrated on his right, opposite my left.

My opponent, given that this is his first game, let me move first.

03-round1.jpg

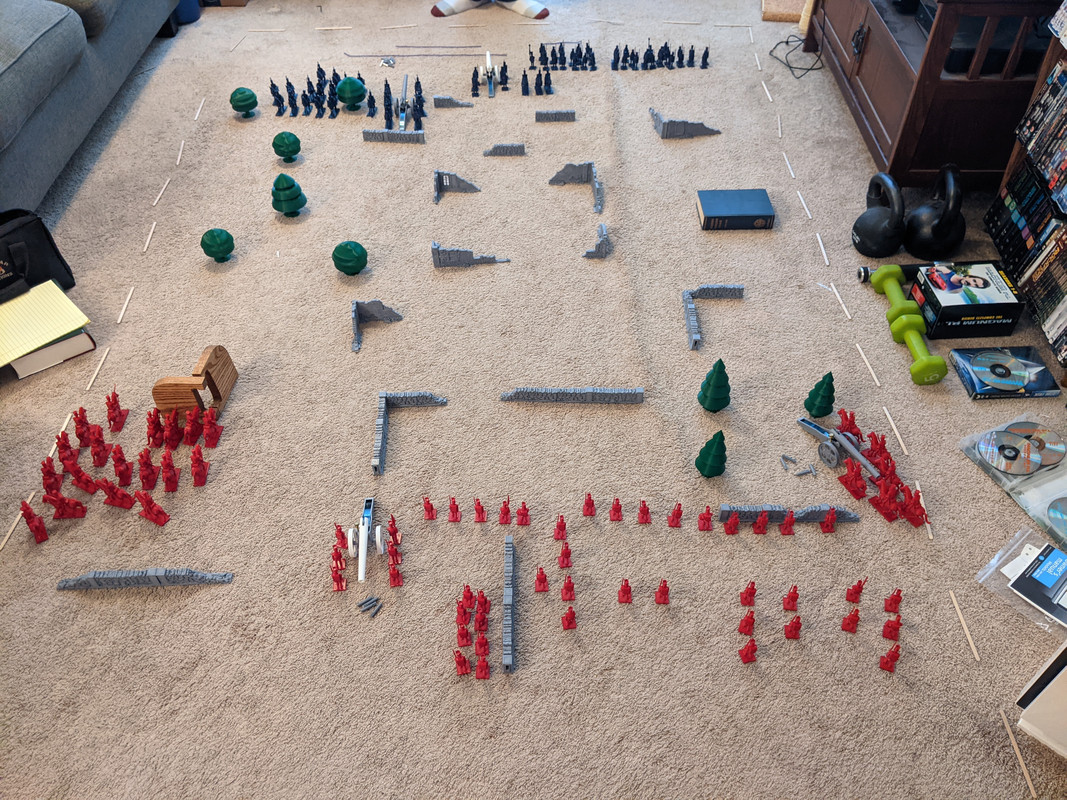
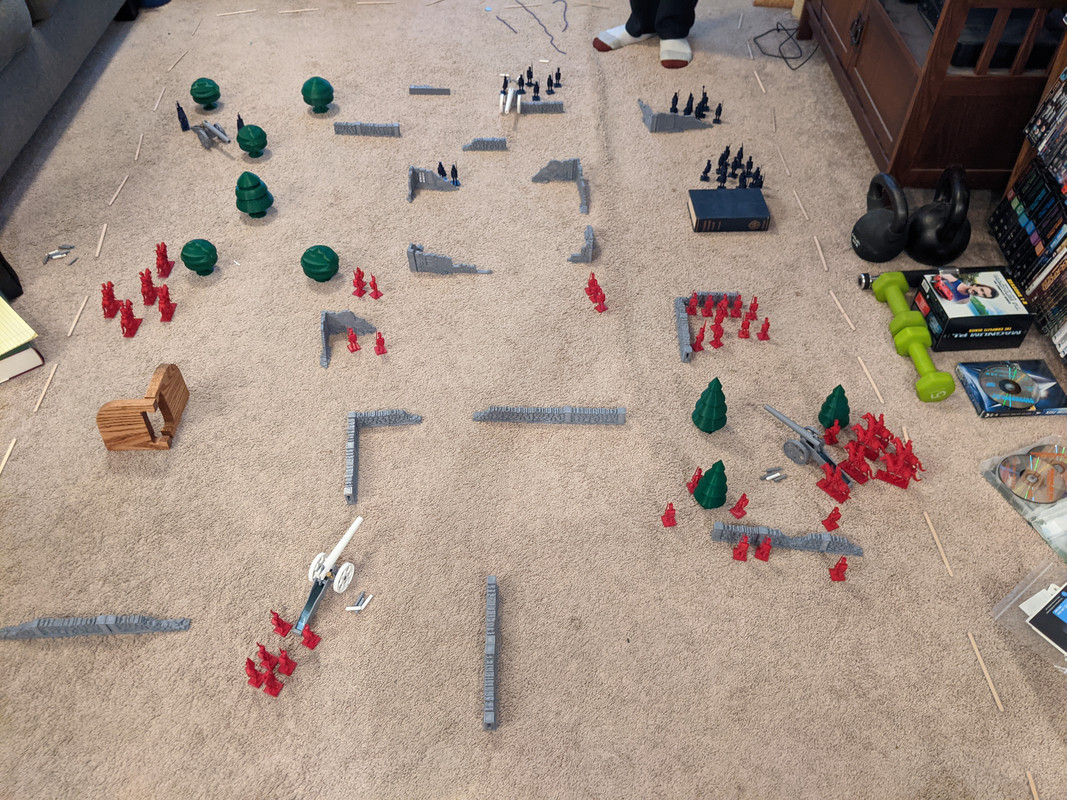
One and a half rounds in, I’ve moved twice and parvusimperator has moved once. My artillery has reached the positions where it’ll spend most of the game: my horse artillery gun, on the strength of its faster movement, takes up position in Chopinburg Wood, while my infantry gun sets up in the southern fields.

04-round2a.jpg

This picture is two turns later, halfway into round 3: parvusimperator has had two turns, and I’ve had three, so my artillery has opened up. Lucky shooting on my part knocks out a number of his cavalrymen on my left, while the gun in the wood hits a few of his men in the northern fields.

05-round2b.jpg

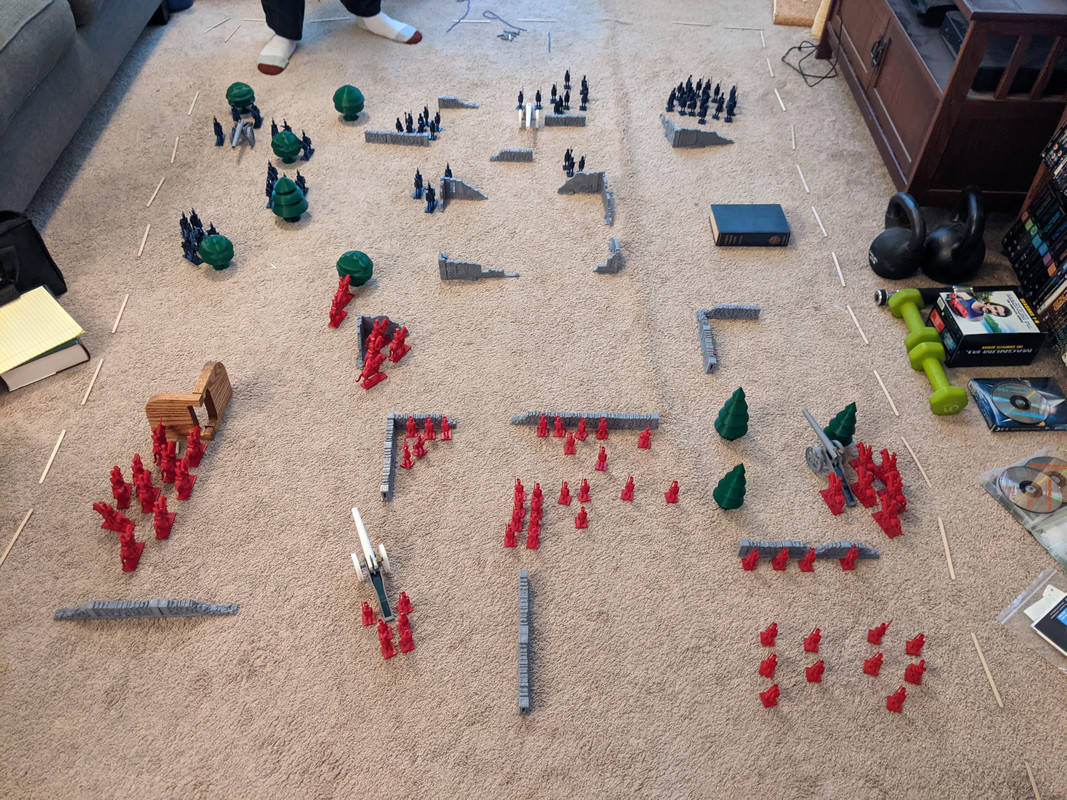
The enemy gun on my left returned fire, clearing out a few of the cavalry massing behind the chapel. Heavy but ineffectual fire from parvusimperator’s center gun hits the stone wall sheltering my center infantry repeatedly, but there are no casualties.

In the meantime, parvusimperator moves some of his cavalry up, obscured from my guns by the shelter of the orchard.

06-round3a.jpg

Our first melee! My cavalry at the chapel, along with the detachments that pushed forward therefrom last turn, charge parvusimperator’s squadron in the orchard, eliminating it. My artillery has a poor turn, only accounting for a pair of infantry.

07-round3b.jpg

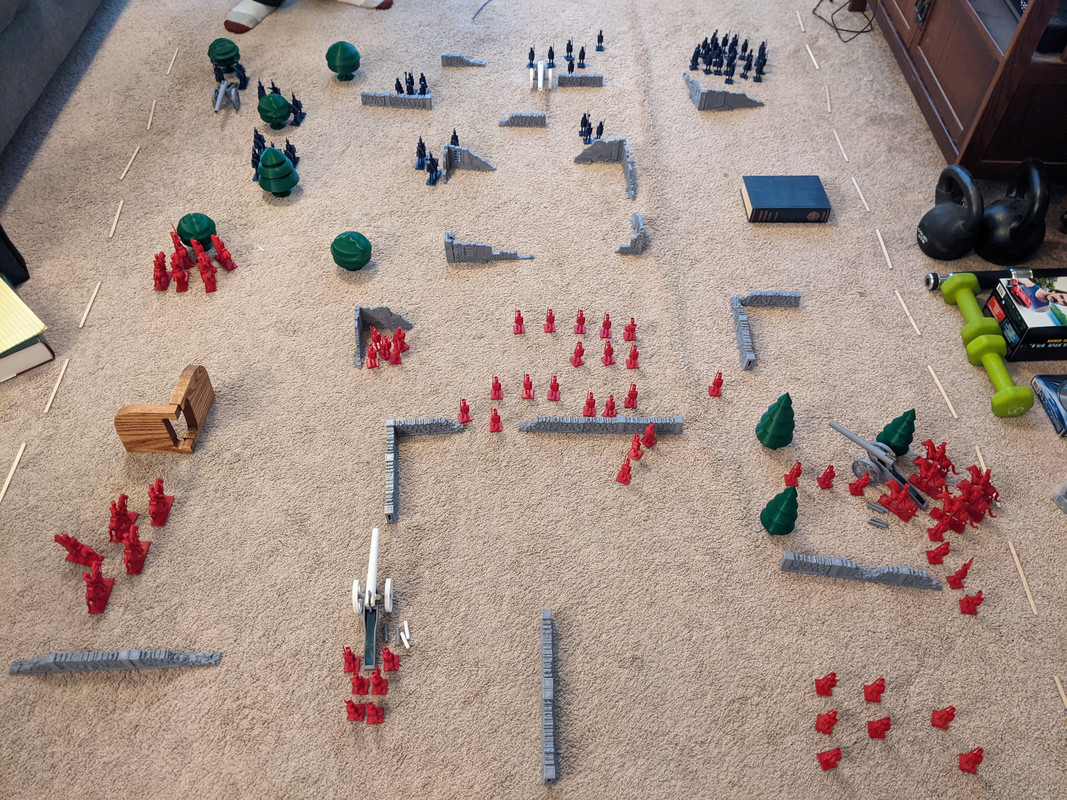
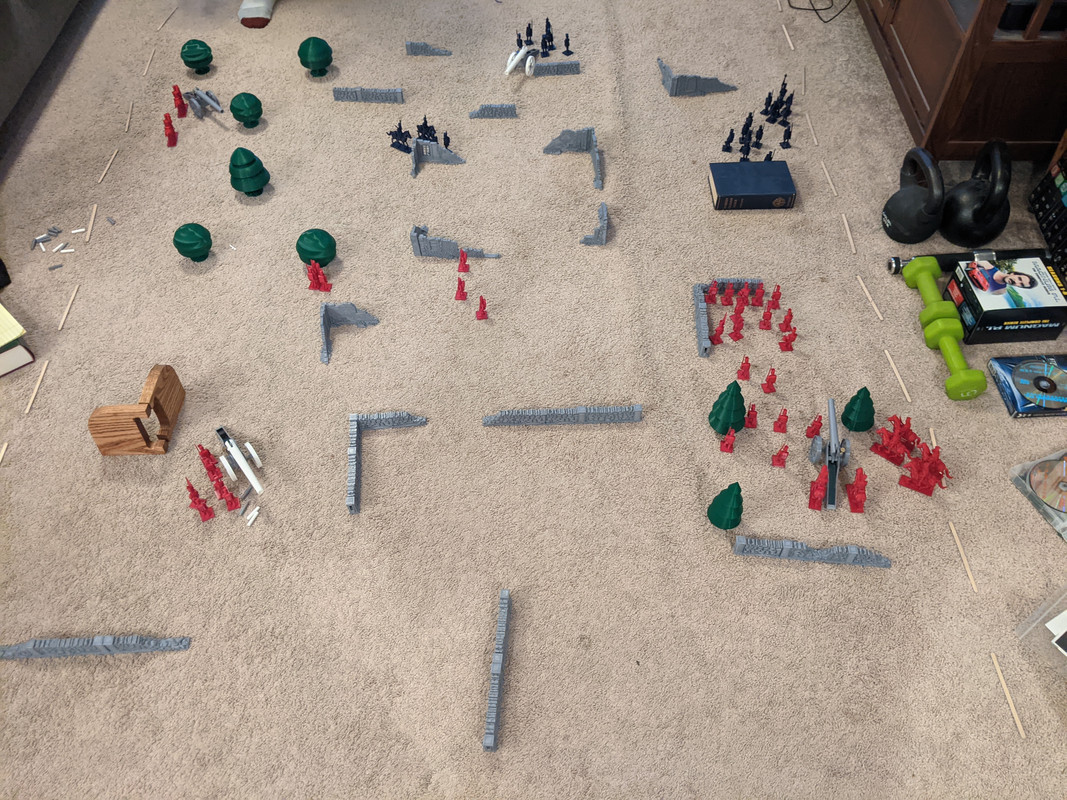
From the last photo to this one, it’s a gap of two turns again. Parvusimperator has begun to advance on my right, sheltered from my guns by the eastern outbuilding. My center gun did take some shots at the advancing blue infantry, but had little effect.

The biggest story of this round was the utter annihilation of my advance cavalry force: parvusimperator’s center gun, with a single shot, took down five horsemen, domino-style. My five remaining cavalry on the left hunker down behind the chapel, while my center infantry advance toward the manor proper, taking cover as the blue guns turn in their direction. I’ve begun to move men north of Chopinburg Wood, arraying them to meet parvusimperator’s impending attack.

08-round4a.jpg

Another melee: parvusimperator’s cavalry at the orchard and the northern wall of the ruins charge my infantry at the southern edge of the manor, after artillery fire weakens them sufficiently for the charge to succeed. On the other flank, his infantry gather behind the outbuilding at Chopinburg House, preparing to advance on my right.

09-round4b.jpg

My artillery opens the turn with a key victory: my gun in Chopinburg Wood disables the enemy gun in the orchard. My other gun chips in by taking out parvusimperator’s detachment advancing through the ruins, hitting individual infantrymen three of four times—accurate fire!

With the gun in the orchard out of action, I’m free to do two things: first, my cavalry at the chapel makes a run for it, hoping to reach and capture parvusimperator’s orchard gun. Second, my infantry sheltering in the southern outbuilding charge parvusimperator’s two remaining cavalrymen who made the attack last turn, killing them.

09-round5b.jpg

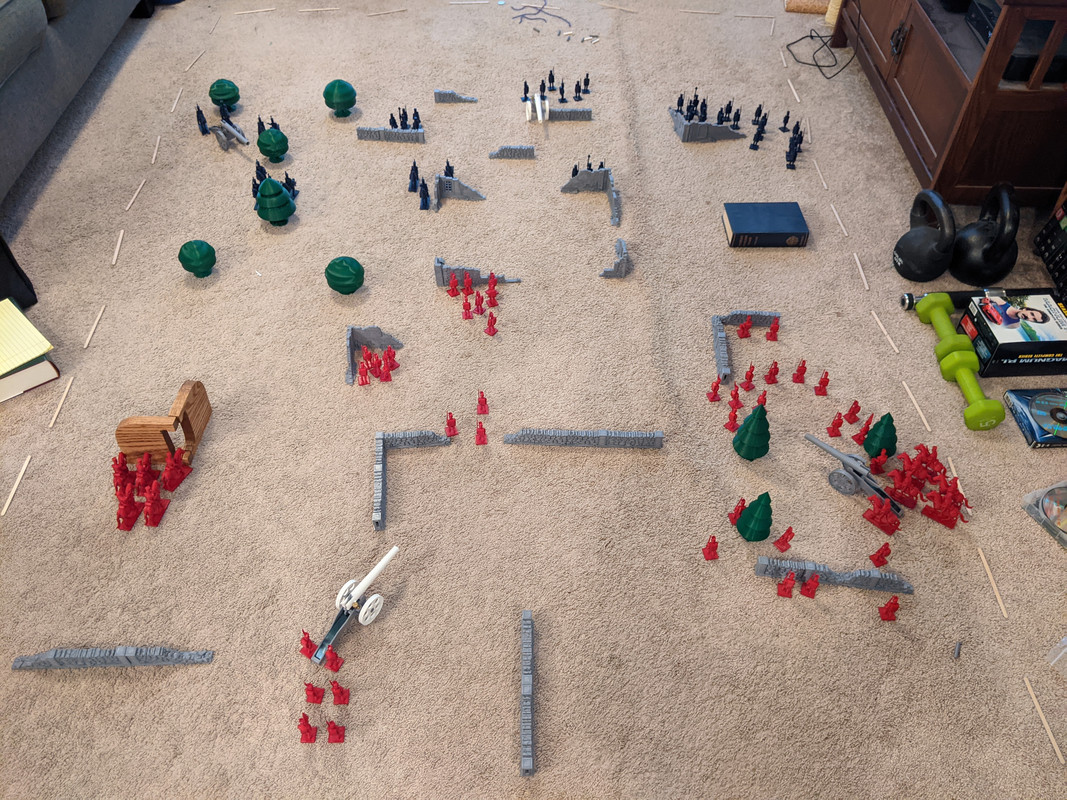
Regrettably, I missed taking a picture after parvusimperator’s turn again, so this is another two-turn gap. It’s also where we decided to end the battle by mutual agreement.

Parvusimperator’s center gun, which earned its keep many times over, hit three of my five cavalry moving on the orchard gun. Even so, he decided to withdraw: his cavalry on the gun were badly placed, far enough apart so that I could engage one without engaging the other, and sheltered from the center gun to boot. My gun in the wood, with some very careful aiming, managed to put a few shots into the infantry massed behind the eastern outbuilding, reducing their strength to the point that parvusimperator no longer felt comfortable making an attack into the teeth of the gun. We tallied the forces on the field, and I emerged the victor with a score of 67 to 35 (counting the partially-captured gun for half).

At this point, neither of us thought we could push our advantage to a decisive victory. According to Wells’ rules, I could have made him play out the retreat, giving myself the chance to reduce his forces further. This would have been deeply unsporting, however, since I realized that I never actually put ‘how to retreat’ in my rewriting of the rules. Oops.

Here are some glamor shots of the final state of the battlefield, followed by some analysis.

10-glamor.jpg
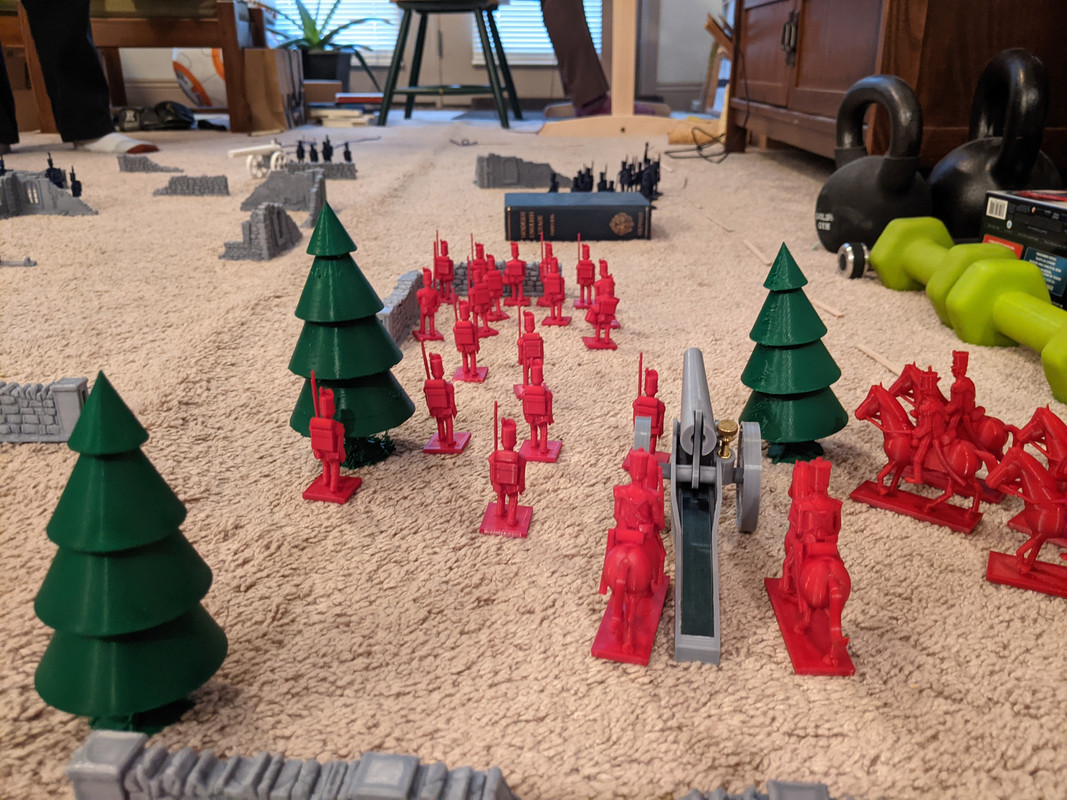
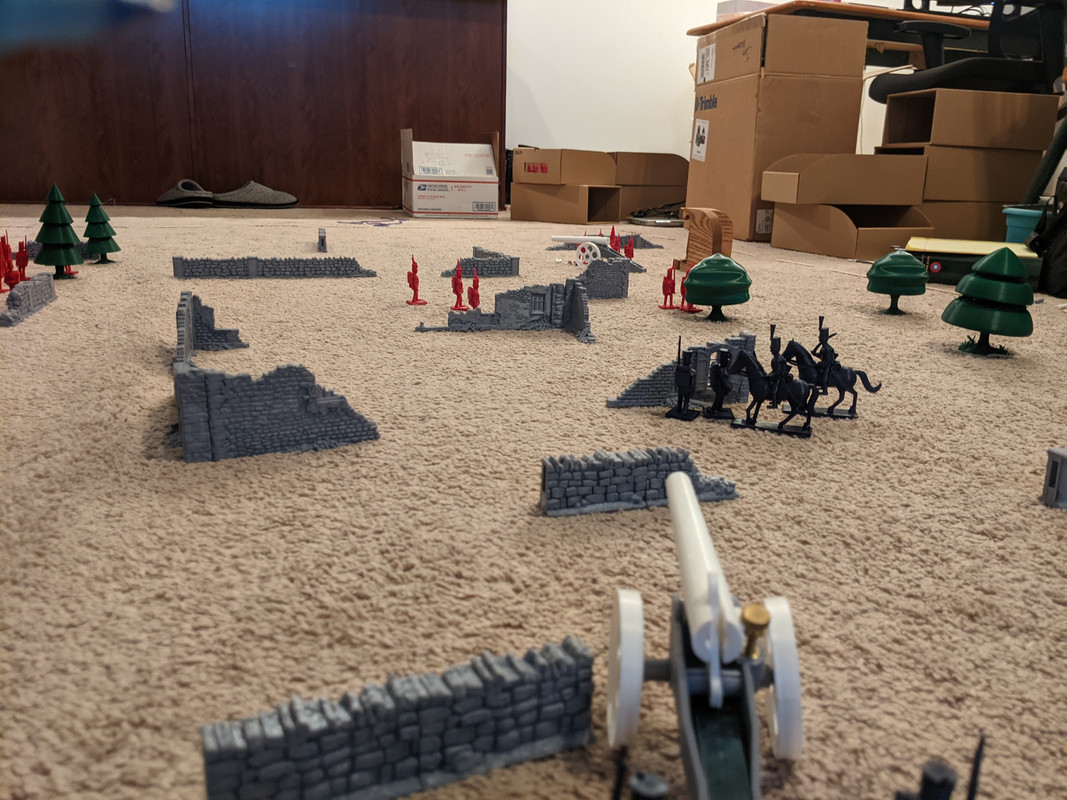
Looking north from my position in Chopinburg Wood, the bastion that survived until the end of the game.

11-glamor.jpg
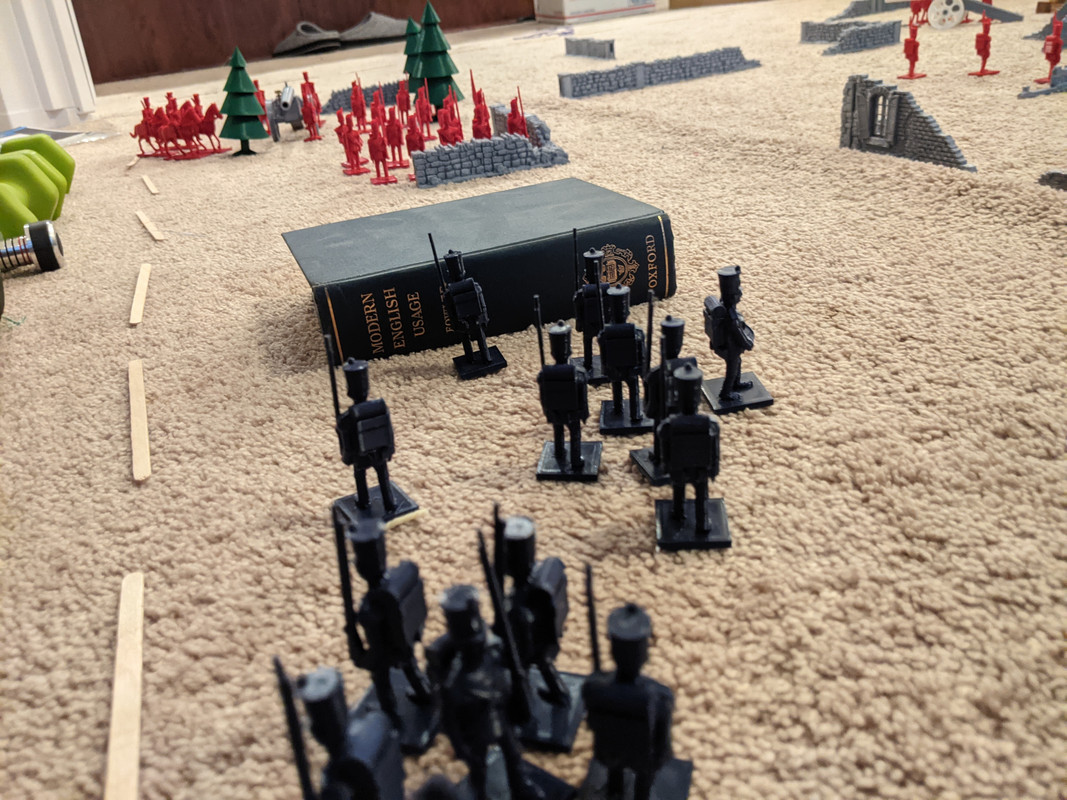
French soldiers shelter behind Modern English Usage, which we thought was funny.

12-glamor.jpg
The view of the field from Parvusimperator’s center gun. A commanding position, fire from which adroitly and repeatedly stymied my attempts to assault in the center and down my left.

Analysis time!

Time Limits

This is the first game I played where we reduced the turn time limits as men were killed. As it turns out, this is a critically important feature of the rules. On my turns through most of the game, I wasn’t able to use my cannons to their fullest and move all my men. Parvusimperator, a bit speedier, usually had a few tens of seconds left. The pressure is key: there simply isn’t time to get up and measure out a potential countermove, or who exactly will be in a melee. You have to rely on feel, which is a kind of randomization.

Cavalry

Cavalry still feel a little wimpy. They’re massive artillery targets, and in making their bases narrow enough so that frontal cannon fire can knock them over, I made them poorly-balanced enough so that they’re at risk of domino effect, one knocking the next over, if hit by enfilading fire. The cavalry charge rules will certainly help to some degree, although the rifle fire rules might count in opposition.

It also feels a bit strange that infantry can charge cavalry and bring them to combat. I’m not quite sure if or how to fix that organically.

Scenery

The printed terrain pieces were fantastic. The stone walls provided good cover to men in proximity without being impossible to shoot over, and the trees and ruin sections helped break up artillery sight lines without promoting quite the same amount of hiding all your men behind the largest piece of cover.

Cover being decent but not perfect was a major contributing factor to the number of melees we saw: it was much easier to get men in close in sufficient quantity than it has been in battles past.

Army Size

In rereading Little Wars before this battle, I realized that the forces we fought with are very similar to those in Wells’ example Battle of Hook’s Farm. There, two forces of 48 infantry, 25 horse, and 3 guns fought; here, the forces were 45 infantry, 24 horse, and 2 guns.

45/24/2 felt like a near-perfect ratio to me: the cavalry got into it in the early stages of the battle; infantry held positions and occasionally made attacks; the guns were important but not so much so that they overwhelmed the importance of maneuver.

Limited Ammo

If I want to do limited ammo, I think I probably need to have a stock of 25 or 30 shells per gun. It should be expensive to bring that much artillery firepower, but given the four-shots-per-turn limit, it’s entirely possible to use that many if your guns are well-placed.

We both remarked that limited ammo would have led to some extremely interesting choices: some of the shots we took were pretty low-percentage, especially early in the battle, and if we had to count shells, we might have skipped some of it, leading to more action in the mid-battle rounds.

Strategic Locations

I have strategic location variants written in the rules right now, but I’m not sure if there’s a place for them, given further thought. In Wells’ rules, the battle ends when one side retreats or is entirely eliminated. That doesn’t leave much room for divvying up victory points based on real estate held.

On the other hand, ending battles like we’ve done so far, with one side offering the other a truce, eliminates retreats from the game, and managing a fighting retreat seems like the kind of skill Little Wars ought to reward.

I wonder if there’s some way to combine the two: a two-stage battle, say. If one side holds an advantage in strategic locations for N rounds, it’s won the day, and the other side must then retreat from the field. Worth some thought.

Bigger Battlefields

The largest battle Wells mentions in his book is hundreds of soldiers on an eighteen-foot front.

Today’s battle was played on a front of about 5-6 feet, with a depth of 10-12 feet. Given furniture, a 12-foot front with 9 feet of depth is possible at my house, maybe a little more if we move things around.

The very largest room I have access to is at my mother’s house, if we move a couch and a table, and is maybe 12 by 12, given the furniture we can’t move. I’d love to play on an 18-by-12 field someday (in teams, perhaps, to keep turn times from getting too out of hand), but I can’t think of anywhere I could do that for free beyond maybe my driveway (impractical, because I wouldn’t want to pit PLA against south-facing blacktop) or the lobby at my church (not impossible, but I don’t know if I’d call it plausible).

I suppose I could also try the clubhouse at one of my shooting ranges.

Final Thoughts

Even though I spent a bunch of time just now thinking about ways to make the game better, that doesn’t mean it isn’t already good. The two people I’ve played with so far have both been nearly as enamored with it as me, and neither one said, “You know, once was enough.”

Time to get the printer working again, I guess.

Wednesday What We’re Reading (Feb. 3, 2021)

This is volume 105, an auspicious number for artillerists. I’ve been slowly working through the backlog of spam users I mentioned in last night’s post, and decided to turn off registration entirely after recaptcha failed to stop a few spam registrations last night.

Defense

Stonks

Science and Technology

Culture Wars

Grab Bag

The spammers are coming!

They found the forum, but nobody uses it anyway, so I shut it down.

Future socializing will be done in Discord. Future user registrations and logins are guarded by captcha, but again, I don’t think anybody besides parvusimperator and I use site accounts.

We now return you to our irregularly-scheduled programming.

Fishbreath Prints: the Glockblaster 3D

First, there was the Glockblaster. It’s parvusimperator’s favored carry Glock 19, with its micro red dot and its little compensator. Then came the Glockblaster 2 and Glockblaster 2.0, two USPSA project proposals parvusimperator and I both considered, then ultimately dropped1.

Now, there’s the Glockblaster 3D2.

The Glockblaster 3D is a project I’ve been wanting to tackle for some time now, and recent and upcoming stimulus checks provide the perfect excuse. I mean, the perfect reason. In short, the goal isn’t to build an everyday USPSA Open gun. The goal is to build a to build a .40 S&W3 Open gun using about as many 3D-printed parts as I can get away with4.

The obvious place to start, since the ground is well covered, is the frame. There are a number of options out there, but the best one was just released: the Defense Distributed G17.2, recently released by one Ivan the Troll, noted 3D printer gunsmith. It uses milled metal rail sections secured by pins front and rear, which helps out in a later step.

I may have gotten a bit ahead of myself, though—why a Glock in the first place, among all the printable options? Even if I’m not a Glock guy, the arguments in its favor I made in my Glockblaster 2.0 post still hold: the aftermarket isn’t there for any other option. The Glock is the de facto AR platform of the pistol world, even if the P320 has a better claim to the title given its design. Triggers, internal parts, and partial and complete uppers are all dead easy to find. Expertise is a bit harder to come by, but our very own parvusimperator happens to be a bit of a Glockhead, and is interested in seeing how this project goes5.

So, Glock it is. What do I want to get out of the project? As I alluded to earlier, what I don’t need it to be is a daily-driver competition gun6. I’m happy in Revolver, and plan to shoot it to the near-exclusion of all other divisions for some time to come. So, the Glockblaster 3D doesn’t have to be especially reliable, or especially good at its job. It’s a 3D printing technology demonstrator on the one hand, and a silly range toy I can take to matches for the afternoon shoot on the other, and if it jams up or disassembles itself, so be it.

Unlike a lot of my projects, this one isn’t as simple as buying a bunch of parts and putting them together. I see seven steps between where I am now and a completed Glockblaster 3D.

Step 1: finish a frame in PLA

PLA is easy to print with, and durable enough to make a frame that’ll stand up to both 9mm and, eventually, .40.

So, to get my feet beneath me in the field of making Glocks from nothing, I’m going to to start here. I’ll print a frame in PLA, buy the rails and parts kits I need, and get to a working frame.

Step 2: finish functional 9mm build

Parvusimperator has a Glock 17 upper I can slap on to see if everything fits, and perhaps even if everything works live.

I don’t know if I want a 9mm upper myself, at least at first. It depends in part on what kind of money the US government decides to send me. Given the parameters of the project (‘build a .40 Open Glock with 3D-printed parts’), spending money on a 9mm upper seems like a distraction. On the other hand, if I build a 9mm upper using a .40->9mm conversion barrel, I’m only out the cost of a barrel, and then I have something to shoot between this step and the end of the project. Plus, I can modify the rail units as required for a .40 slide without having to worry about 9mm function later.

So, I guess we’ll see.

Step 3: set up the printer for nylon

For something with long-term durability, I’m going to want a better material. In the past, PLA’s strength has surprised me, and its mechanical properties are sufficient for printing firearms, but nylon has two advantages.

First: it’s slipperier than PLA, which is good for parts that interface with metal. A slide whipping back and forth on top of nylon will do less damage to the nylon over time than it will to PLA. Second, and more importantly: nylon has much better performance at high temperatures than PLA, and will easily stand up to a match on a hot day, or being left in a hot car.

To print in nylon, I’ll need a hotend for the 3D printer that can push filament at about 270C, or 30-40C hotter than is wise to push the current hotend can7. I may also need an enclosure for the printer, which keeps the print area hotter to limit warming, and will definitely need some filament drying supplies: a box with some spools in and a layer of silica gel on the bottom, to keep dry filament dry, and a food dehydrator to turn wet filament into dry filament. (And also, perhaps, to make beef into match jerky, although I’ll have to look into whether it’s safe to use the same food dehydrator for both items.) I think I’d probably want to invest in an air purifier for the printer room, too, not for nylon specifically but just because it’s good for our indoor air quality to suck up all those VOCs and microparticles.

All of that makes for a fairly expensive and fairly involved process, so that brings me to step 4, which I can work on at the same time.

Step 4: make a sight mount for the DD/FMDA Glock

SJC makes perfectly serviceable Glock sight mounts that don’t occupy the accessory rail and don’t block the ejection port, but they require drilling into the frame to make a second pin hole. The FMDA Glock, on the other hand, has a pin forward of the trigger guard, for the front rail unit, that can be used as a second anchor point (along with one of the locking block pins).

That front pin is featureless and thus easy to replace with a longer one. Both pins above the trigger guard, however, have additional features: the locking block pin is slightly dumbbell-shaped, with wider ends and a narrower middle, while the trigger pin has cuts into which the slide release fits to help retain it.

I am not a Glock guy, so I don’t know if those cuts are function-critical. My hope is that the locking block pin can be replaced with a featureless, non-dumbbelled one, which makes the task of designing a sight mount super-easy. (Although I may still have to have it printed by some manner of print house, so I can have it glass- or carbon-fiber-reinforced for stiffness.)

If the locking block pin can’t be so replaced, then it’s on to hooking into the trigger pin. I’m pretty sure, based on how the SJC sight mount is attached, that the cuts on the trigger pin are purely for anti-walk, and for a technology demonstrator like this, I can either omit them entirely and just push the pin back into place when it starts moving, or cut them in myself with a dremel.

Step 5: build a .40 upper

Now we’re getting into the home stretch.

A .40 upper requires a slight tweak to the lower: I’ll have to modify the front rail unit to allow the slide to fully cycle. Happily, it’s not a hard modification—just need to shave a bit off of the front so that the slide doesn’t crash into the rails, and a light chamfer with a file or a dremel is not hard to achieve.

I haven’t decided yet if I want to do the Glock 22-length slide or the Glock 35-length slide. On the one hand, the latter adds weight (good!) and gives me a bit more room to hang a weight under the front of the gun without getting in the way of the eventual DAA holster block (also good!; saves me money on a different holster).

On the other, the Glock 22-length is actually tested, and parts availability is a bit better.

I think I probably lean slightly toward the 35-length, because I like giant handguns.

Step 6: compensator, spring tuning, etc.

SJC sells the benchmark Glock compensator, an 11-port number that seems to work fairly well even in its .40 version8. Not much more to say about it. This is one part I clearly can’t 3D print, not that it isn’t tempting to try with a prototype and a laser-sintered version.

Spring tuning includes both recoil spring (to get the gun to run well with the compensator) and trigger work. Since I shoot Revolver in USPSA by day, I think I want a Walther-style ‘rolling break’, emulating the wheelgun’s double action pull. That’s easier to achieve than glass-rod break on partially-cocked striker-fired guns anyway.

Step 7: random Open accoutrements

USPSA Open lets you do just about anything you want. I have a few ideas that go from normal to silly.

Normal idea 1: a slide racker in place of the rear sight. Because the sight mount covers some of the slide, there aren’t as many ways to get your hands on it. A slide racker gives you a knob or handle of some kind to grab, resolving the problem altogether.

Normal idea 2: frame weight and brass magazine well. A magwell is a traditional Open gun feature. Making it out of brass adds a bunch of weight, which is good on lightweight guns like Glocks. SJC makes one, although I’ll have to modify the frame to attach it.

The frame weight is also a traditional Glock item, adding weight to the gun and also reducing muzzle flip. In this case, I think I’ll have to roll my own: the existing options don’t play nice with the DAA holster I have for the revolver, and I don’t feel like buying a new holster for this goof-off gun.

Silly idea 1: a Radetec RISC bullet counter. I’m pretty sure that it doesn’t do any detection of reloads, and since I wouldn’t expect to be shooting to slide lock very often, it’ll be wrong after I drop the first magazine. That said, given the constraints of USPSA, I don’t really care. It’s 75% about looking cool anyway.

Silly idea 2: a tuned mass damper in place of a frame weight. A moving mass on a spring, damped by either liquid or a near-airtight fit, seems like it might help? It worked for the Renault F1 team in the early 2000s, anyway, and a gun moving back and forth shooting doubles is kind of like a stiff suspension moving under load.

This, I think, is the most silly of my ideas, but it’s an indication of a greater truth: 3D printing makes prototyping a silly tuned mass damper for a pistol a matter of a few hours of CAD work and a few dollars of filament. I can explore random things like this with effectively zero cost.

Conclusion

Well, that’s my plan. I’m not expecting to get it done anytime especially soon. I’m about midway through Step 1 now, and there are a number of demands on my finances I consider more important than this.

As I make progress, I’ll be sure to keep you up to date.


  1. He decided to get a real Open gun rather than putz about with trying to turn a Glock into one. I was fine with the putzing around, but decided I’d rather shoot Revolver, so neither Glockblaster 2 nor 2.0 ever existed beyond our imaginations. 
  2. It’s supposed to sound like a bad 80s movie, in the vein of parvusimperator’s Glockblaster 2: Glockblast Harder post. 
  3. I think I’ve gone into ‘why .40’ in the past, so I won’t relitigate that issue here, beyond to remark that it’s still because the project parameters don’t require me to have 30-round magazines. 
  4. I say ‘about’ to leave myself wiggle room if I decide that prudence should dictate I buy a part instead of making it. 
  5. Possibly interested in the same way as people who watch videos of Nurburgring crashes or that one can-opener bridge, but I haven’t asked and don’t intend to. 
  6. If it turns out that it’s that reliable, I won’t complain. Ignore the sound in your head; that’s parvusimperator’s muffled laughter. 
  7. The standard Ender 3 hotend has a PTFE tube that runs all the way down to the nozzle. This is good, because PTFE is low-friction; this is bad, because PTFE offgasses neurotoxins at temperatures above about 250C, and I don’t want to sniff (if you will) that temperature. 
  8. Received wisdom in USPSA is that compensators work best with light bullets going fast, because a light bullet going fast enough to make power factor requires more pressure, which means more gas coming out the end of the barrel, which means more power to the compensator.